To start the new semester we are going to make sketchbooks, something I wish I would have done at the beginning of the year. I have, in the past, asked students to purchase sketchbooks. This had always caused a lot of stress. Students would forget. Some would not be able to purchase a sketchbook. I would search the room for left over or donated books. I would help students make books. Just ensuring that each student had a sketchbook became such a task, that the importance of using the books was minimized to the point that I did not even ask students to get them this year.
Now, as I am getting ready to being the new semester, I am excited about the opportunities creating sketcbooks with my students will bring. I found some really good instructions on Pinterest for how to create the books, but the link doesn't exist anymore.
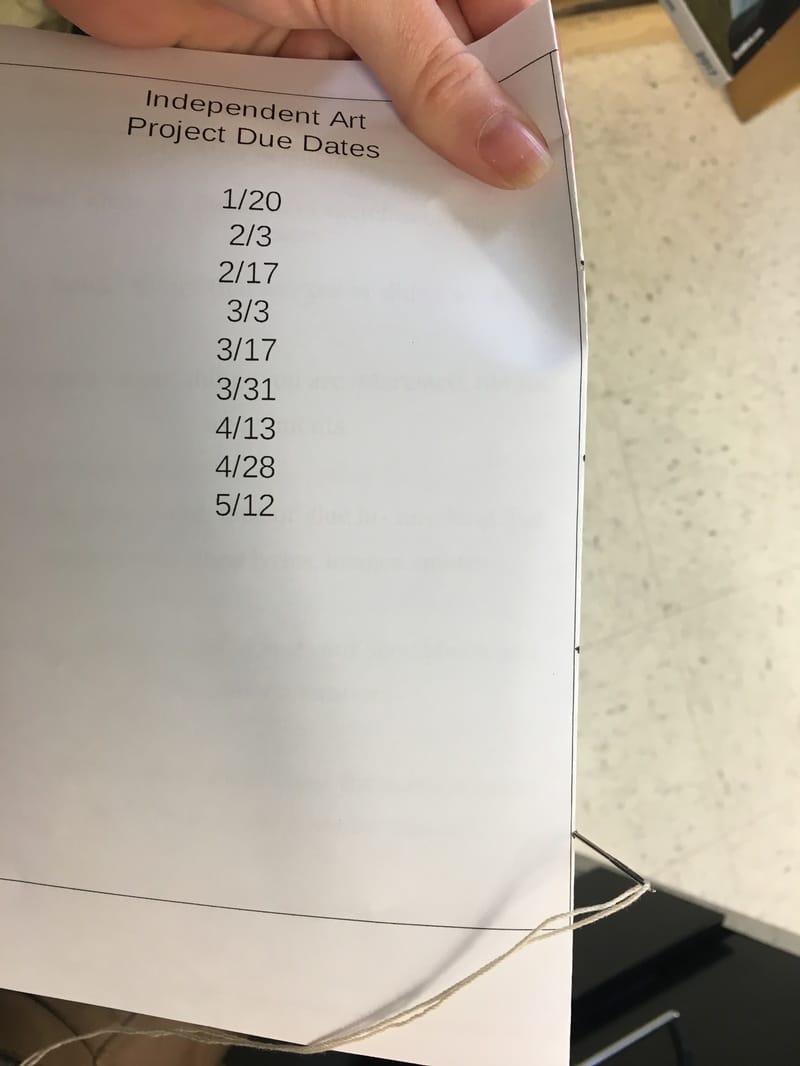
I plan to include along with blank drawing paper, papers that include warm-up drawing prompts, technique advise, and cheat sheets for art students. I will update this post as we complete our sketchbooks.
I plan to include along with blank drawing paper, papers that include warm-up drawing prompts, technique advise, and cheat sheets for art students. I will update this post as we complete our sketchbooks.
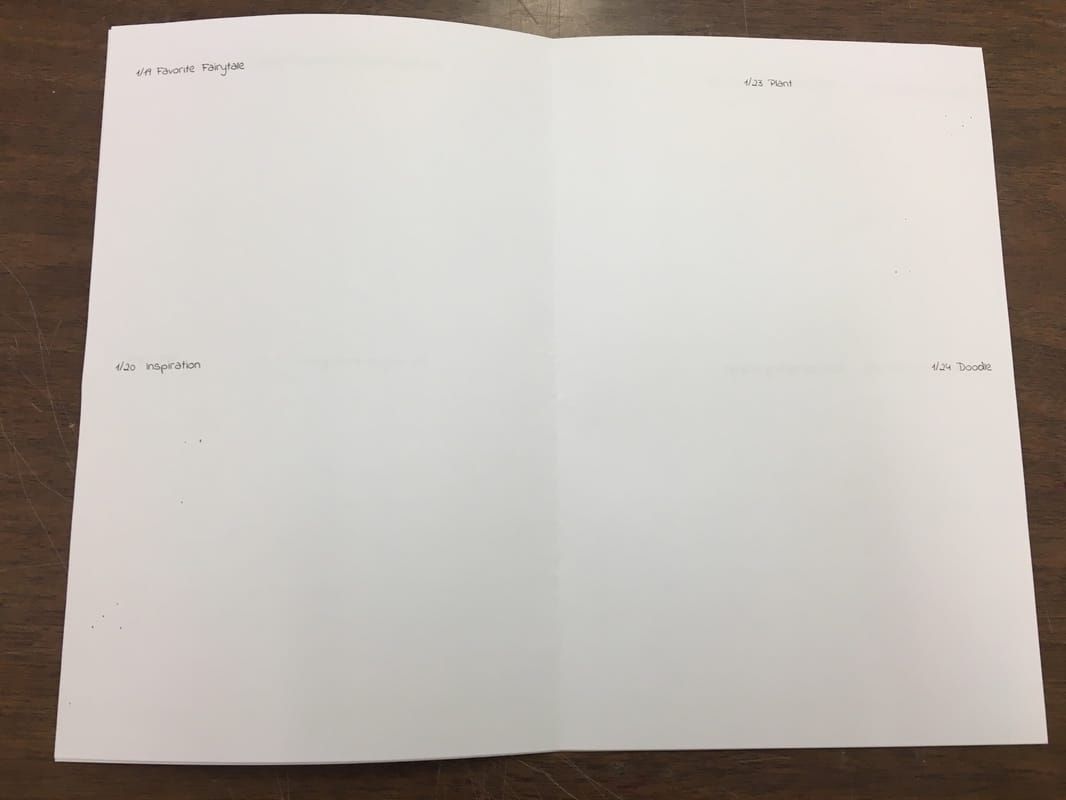
To make these sketchbooks we used computer paper for the first pages. This way I was able to print off warm-ups for every day. The first half of their sketchbooks will be designated things for them to draw everyday and the second half will be sketchbook paper. The instructions we used are as follows:
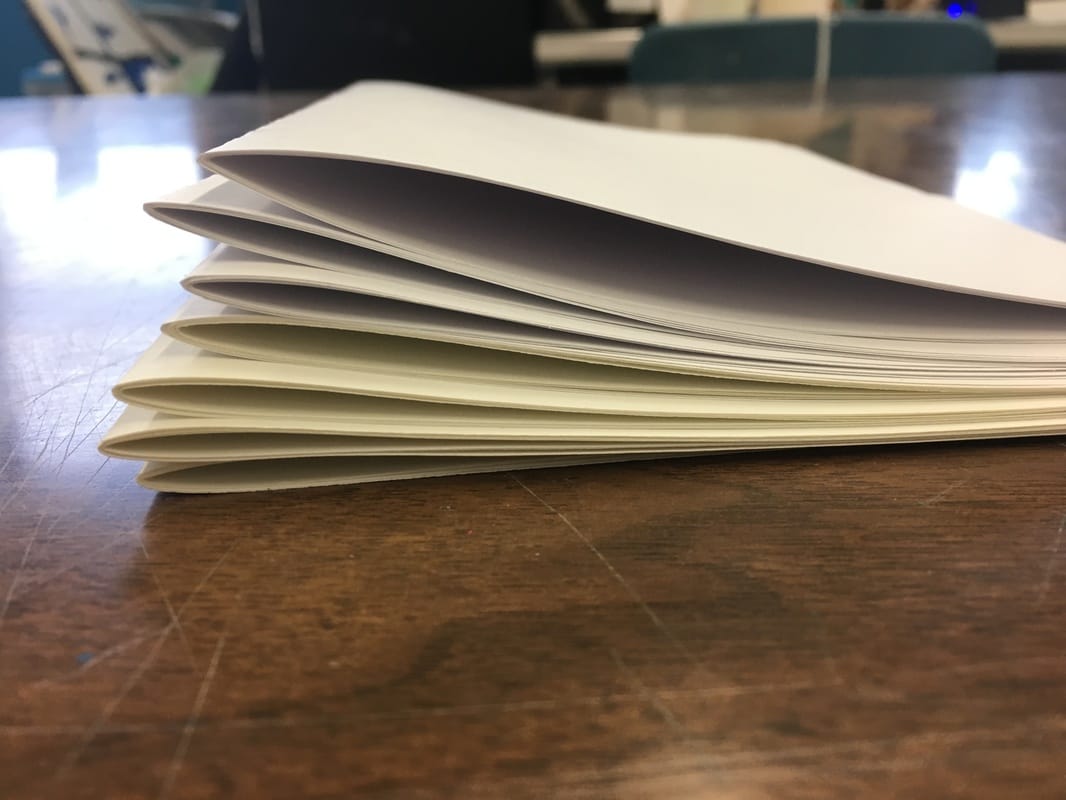
Organize the paper in groups of about four pieces and then fold them in half.
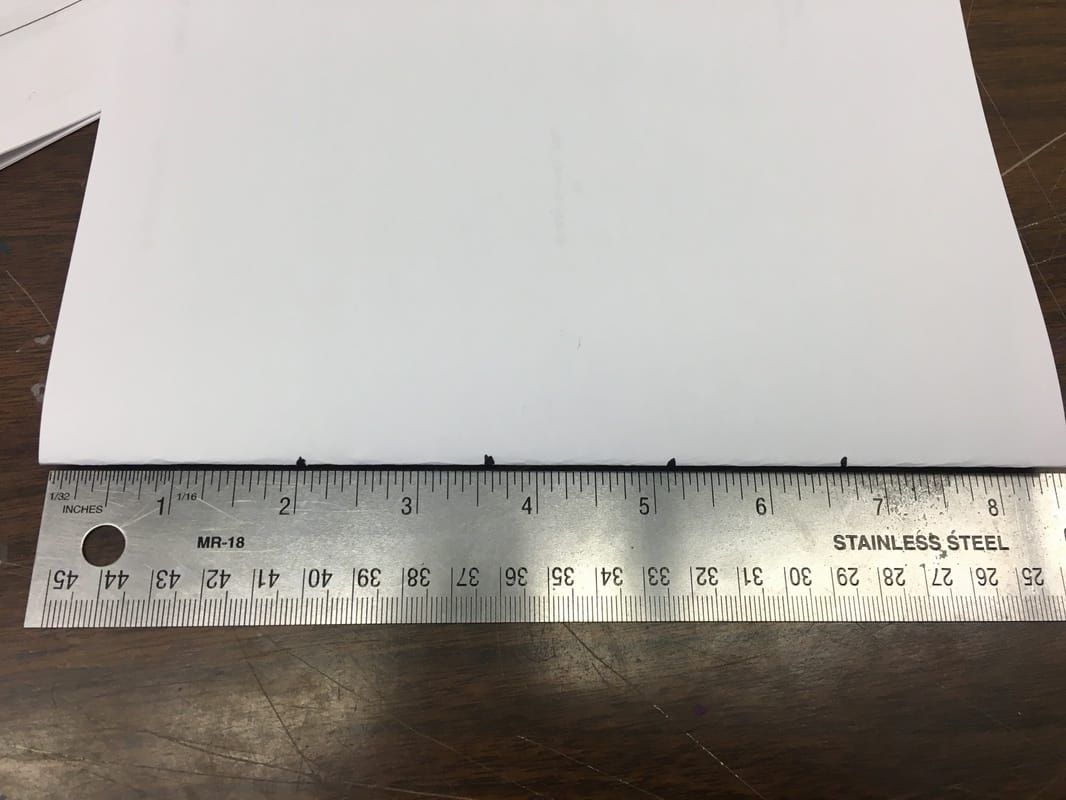
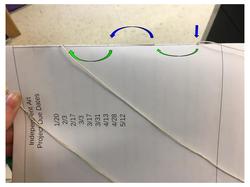
make the folded side of the papers in four places. ( 2 inch, 3 1/2 inch, 5 and 6/12 in)

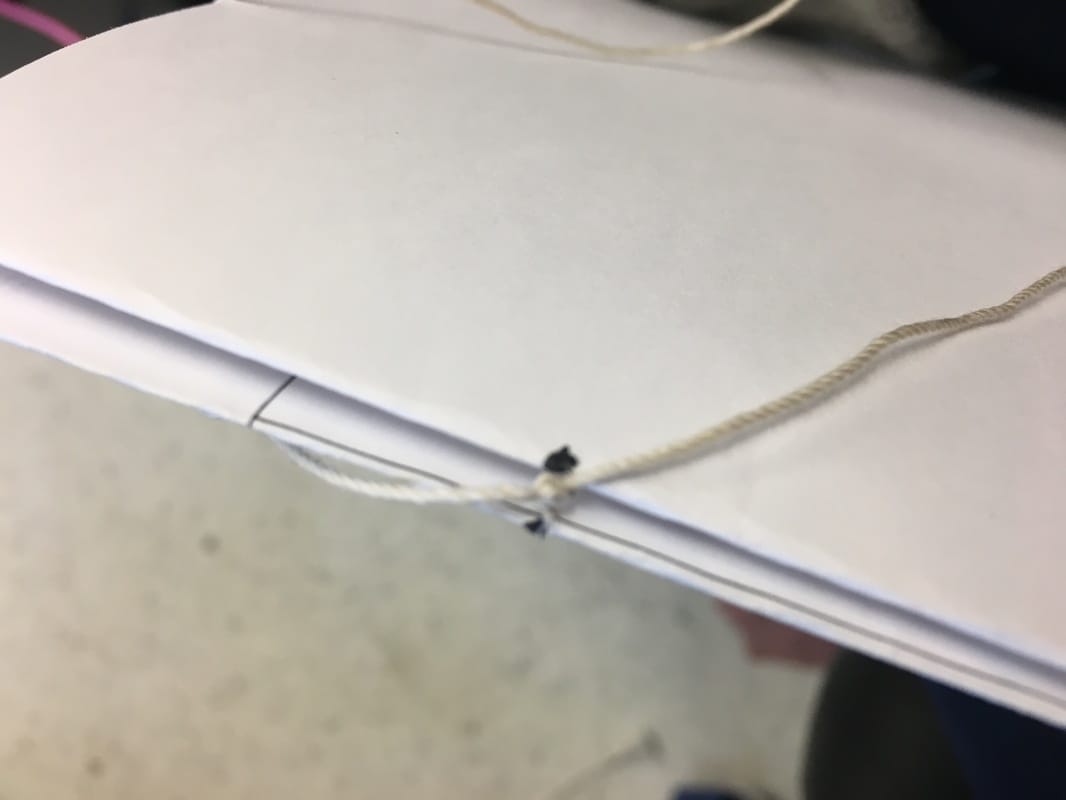
Use mallets and nails to puncture holes in the paper sets on the marks. Unfold each set and pierce them on the marks made in the last step. Pieces of foam core or used illustration boards work well to protect the tables and help puncture the paper.
Starting with the first set of pages, put the needle through from the outside.
Sew the string through the holes, leaving a couple inches of string at the first hole.
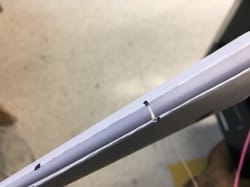
You should go right into the next set of pages.
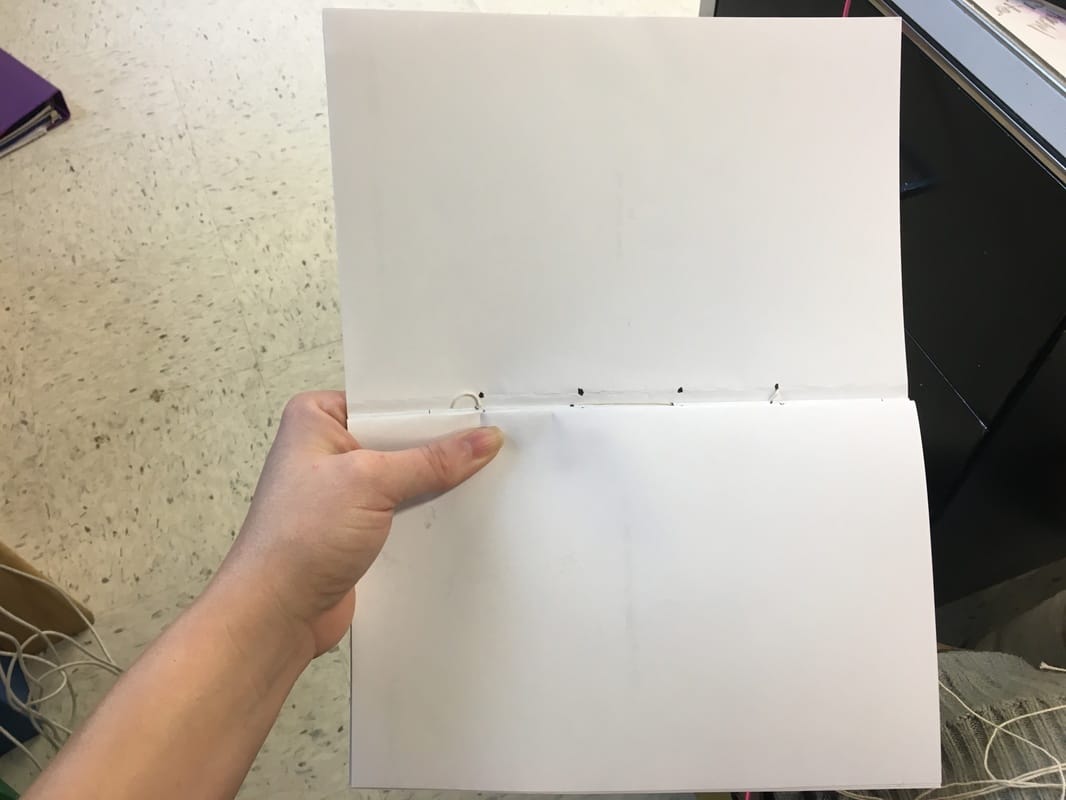
We found that holding the pages with the one that had already been sewn shut and the new pages open worked best.
Once you have the first two sets done tie the extra string to your string to keep the pages together before adding the next group.
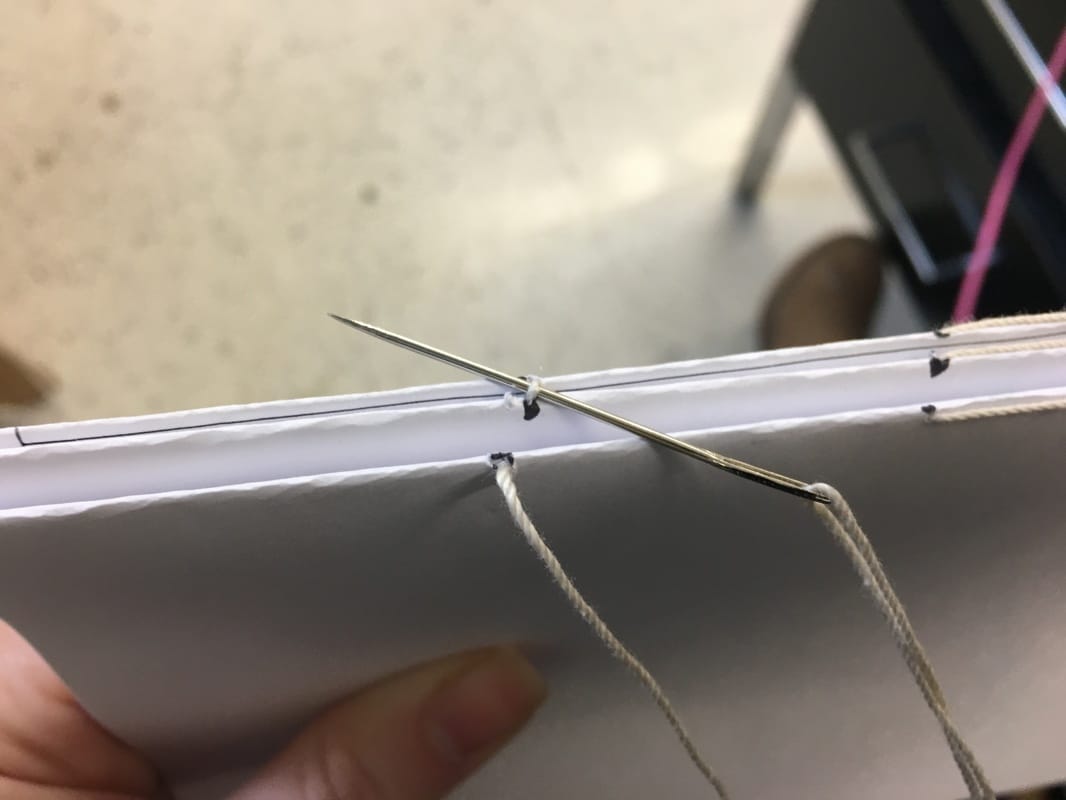
When you reach the end of the rest of the groups you just need to loop through the string of the group before to keep the ends together.
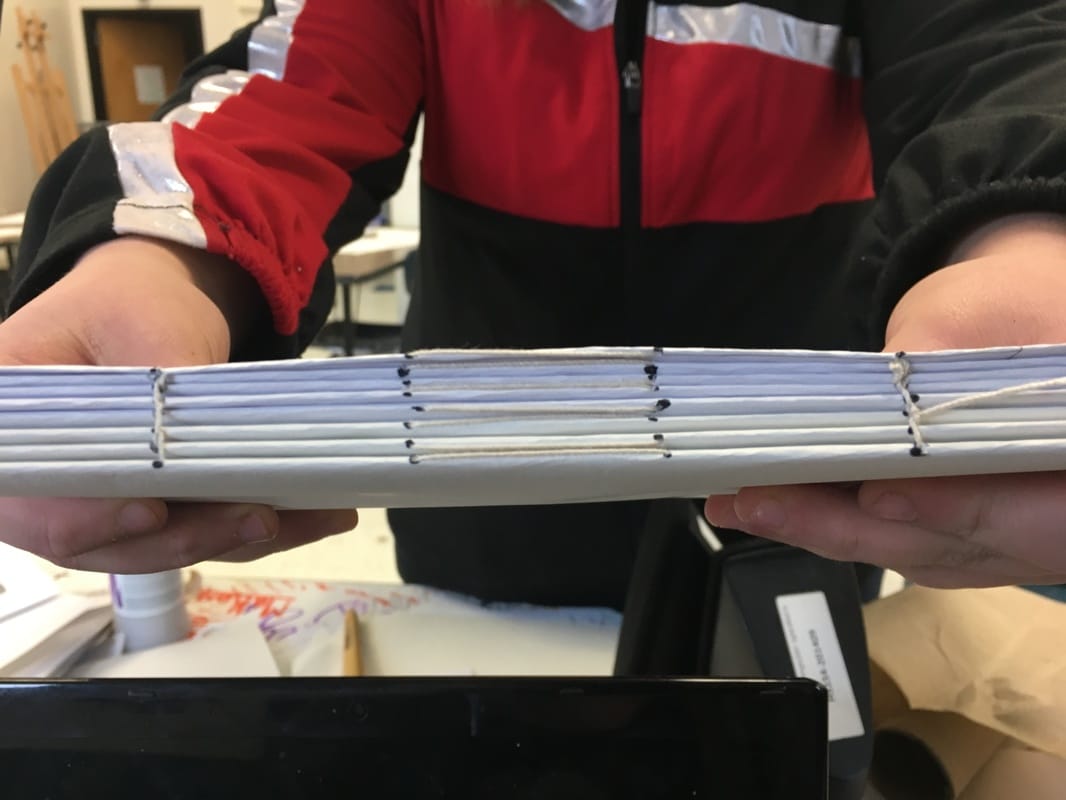
It should look something like this when you are done.
 RSS Feed
