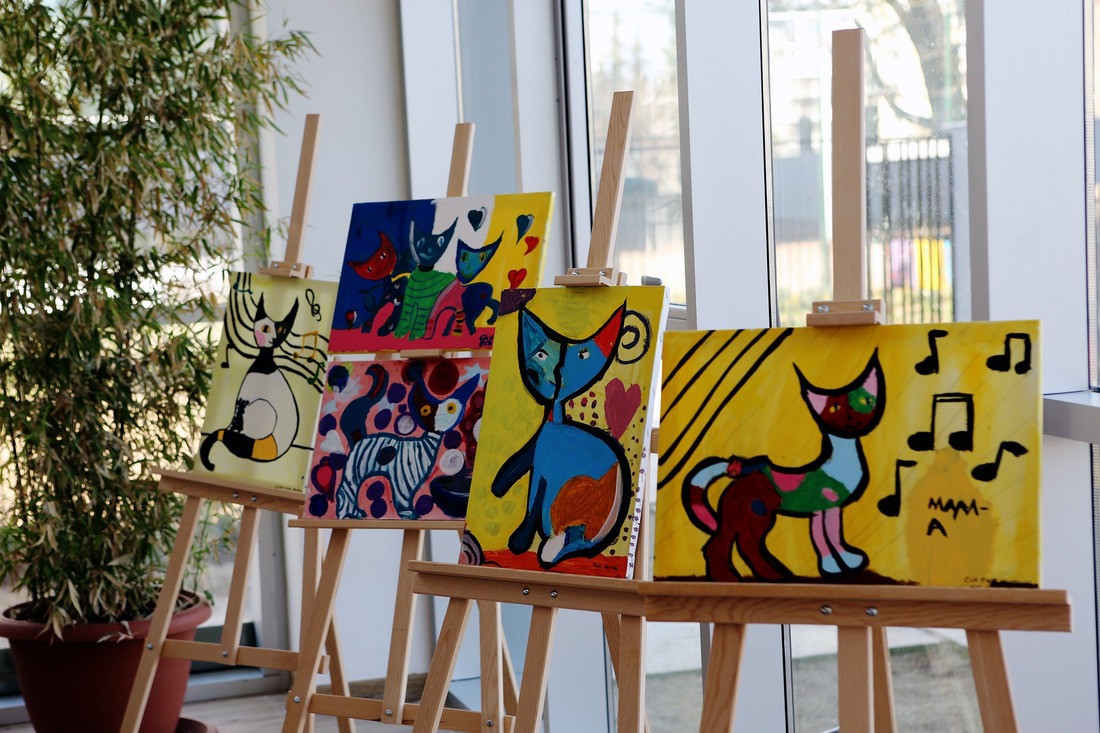
Getting parents to your student art show is one task, but what do you do with them and how do you get them involved once they are there? Imagine a space where parents can not only view their student’s art, but also listen to their child explain what they have learned at the same time. This is where Aurasma can help.
What is Aurasma?
Aurasma is a free app for iOS or Android. It uses image recognition and augmented reality to “hide” messages or videos in real-world locations. Basically with Aurasma you will be able to create a virtual platform for students to express what they have learned to viewers of their art.
This training will explain how to use the app to create augmented reality experiences that can be used to communicate with parents at an art show.
To complete this training you will need a device capable of downloading the app, a video to serve as the Aura, and an object that will be the Trigger image (what makes the Aura appear). To use this as a tool to create an art show, the Video will be of a student discussing his or her art and the Trigger image will be the art.
Since Aurasma is an app, the first step is downloading the app to your device. It can be found in either the Google Play Store or the Apple App Store. Because my devices are iOS, that is what you will see in this training.
Here you will see an example of what the app will look like in the App Store.

You will be prompted to create an account upon opening the app. Go ahead and complete the steps. There will also be a pop-up asking to allow "Aurasma" access to your location, like the one shown below, please select Allow. Without allowing access to your location, the app will not be able to create the Auras necessary to complete this training.

An image of the home screen for Aurasma is show below and should be used to familiarize yourself with the app. To make a new Aura, click the plus sign. The purple shutter button at the bottom is used to view current Auras.

Creating an Aura
Now that you have Aurasma configured on your device, you are ready to create your first Aura. An Aura is the augmented reality your participant will experience when using their device to scan an image Aurasma recognizes. In this training, we will be using student art work as the recognizable images. You will need to have filmed a video of a student discussing their work to use as the Aura for their art. **If you are not ready to input a student video, you can use an overlay from Aurasma's library to complete this training.**
Once you have downloaded the app, the first step is creating the actual Aura. Click the plus sign button at the top right of the screen.
Once you have downloaded the app, the first step is creating the actual Aura. Click the plus sign button at the top right of the screen.

You will see the camera screen with a box in the middle appear. Line the object you wish to tag the augmented reality with inside of the box and push the purple button to capture.
 | You will be prompted to choose an overlay. Be sure to select Device rather than Library so you can find the video you created. (If you do not have a video ready, you will select one from the library.) |
Before selecting your Aura video you will see this pop-up. You will need click OK in order to give the app permission to access your photos.

You should be taken to your photos from there and select the video to serve as the Aura.

When prompted, name your overlay. You will have to name it in order to place it. Something like a descriptive name or the name of the artwork will do. Then click done.
 | When this page appears, select Create a new channel. |
 | Give your channel a descriptive name that you can easily relay to visitors. Set the channel to public so it is searchable and click Done. **You do not have to worry that just anyone will see the videos you turn into Auras. Only those who are actually in front of the artwork will be able to view the videos. |
Follow Up
Your Aura should now be ready to view.
To test that your Aura is online:
To test that your Aura is online:
- While you are on the main menu of Aurasma, click on the purple shutter.
- Aim your device at the Trigger object.
- When you are in the correct location, your Aura will begin to play.
Now all you need to do is have posters ready to tell parents how to download the app. I suggest having student guides ready to lead yours guests through using Aurasma at their first show.
Student Safety
Before creating any videos of students be sure to check with the office to see which students have parental permission for in school photography. Gather permission for any students you do not have by creating a permission slip.
Because Auras can only be viewed when scanning the trigger image, only visitors of the art show will be able to view student videos. Therefore, they will not be available online to the general public.
Because Auras can only be viewed when scanning the trigger image, only visitors of the art show will be able to view student videos. Therefore, they will not be available online to the general public.
Forms: Please download either of the following forms below to aid you in your training journey. Feel free to leave comments or questions in the comments section.
|
| ||||
 RSS Feed
